Update policy schedule wording
Use the Workbench CLI tool to make a simple product module update
Overview
At the end of the previous tutorial, you used the rp clone command to clone a product module to your local machine. In this tutorial, we will make an update to the policy schedule for this product, push our changes to Root, and test the update.
The product you cloned, Dinosure, is a life insurance product targeted at residents of an island off the coast of Costa Rica, Isla Nublar. Since this island is populated by dinosaurs, residents require insurance cover against death or injury caused by a dinosaur.
Your task for this tutorial is to update the wording of the Dinosure policy schedule. Due to an update in the terms and conditions for this product, the following change needs to be made to the policy schedule wording:
Please make sure that you submit your claim in writing within
90120 days from the date of the occurrence of any event that could result in a claim against this policy.
Step 1: Issue a test policy in sandbox
Before we make the change, let's issue a test policy to get a feel for how our change will manifest. To do this, we'll issue a test policy on the Root management dashboard.
- Log onto the dashboard and navigate to your playground organisation.
- Make sure you are in sandbox mode. If you are in sandbox mode, you will see a thin yellow banner across the top of the window. If you are not in sandbox mode, go to "
 Data management > Environment > Switch to sandbox mode".
 - Navigate to "
 Policies" (top icon in the vertical blue navigation bar on the left).
 - Click the blue "New Policy" button, top-right
- Click "Add" on dinosure onboarding product module, and then select "Live" to use the live product module definition. Note: If you don't see the option to use the "Live" or "Latest draft" version of the product module definition, you may need to log out of the dashboard and log back in again.
Fill in the form inputs and follow the prompts until you have issued a policy. You can skip optional form inputs.
In the "Add a policyholder" step, use your own email address in order to receive the policy issued email and policy schedule.
Once you've issued a policy, go to your email inbox and find the email you received with the policy schedule. Open the policy schedule PDF and locate the wording that needs to be updated. Note: If you are asked for a password to open the document, enter the ID number you used when issuing the policy.
Sandbox modeSandbox mode is used for testing on Root. You can safely experiment in sandbox mode without worrying about breaking anything or creating unintended side-effects. When you are in sandbox mode, you cannot issue "real" policies. No billing or collections will run for policies issued in sandbox mode.
However, issuing and updating sandbox policies do trigger customer notifications, such as email notifications to policyholders.
Read more about the sandbox environment in the Overview guide.
Step 2: Implement the change locally
Now that you know what you need to change, navigate to the local folder containing your product module files. Open the file policy-schedule.html in the documents folder in VS Code.
This is the HTML template used to generate the policy schedule PDF you received via email. You can read more about how policy documents are converted from HTML templates to PDF in the policy documents guide.
You can now find the relevant paragraph in the HTML, change the wording, and save the updated file. Replace this:
<p style="line-height: 16px;">
  Please make sure that you submit your claim in writing within 90 days from the date of the occurrence of any
  event that could result in a claim against this policy. You can lodge a claim on our website or by calling us
  on 001-337-1337.
</p>
with this:
<p style="line-height: 16px;">
  Please make sure that you submit your claim in writing within 120 days from the date of the occurrence of any
  event that could result in a claim against this policy. You can lodge a claim on our website or by calling us
  on 001-337-1337.
</p>
Make sure to save the updated file.
Step 3: Push the change to Root
Now that you've updated the file locally, you need to push your changes to Root.
Make sure your terminal is open in the parent directory of the product module (dinosure_<your_name>). Now use the command rp push to push your changes to Root.
You should see a message summarising the differences between your local files, and the files saved to Root. The only difference should be policy-schedule.html.
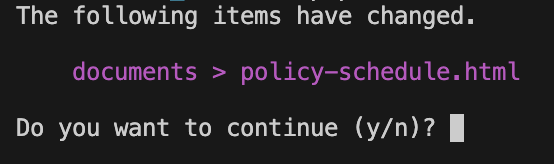
Enter y to confirm the changes. You should now get a success message.

Note that pushing your changes created a new draft version of the product module.
Draft and live versions of a product moduleEvery time a new change is pushed to a product module, this creates a new minor version of the product module definition. For example, version 2.2 will be created from version 2.1.
Read more about the draft and live versions of a product module in the Product modules overview guide.
Step 4: Test that it worked
You can now navigate back to the dashboard and follow the steps to issue a new policy. This time, make sure to select "Latest draft" when you add the policy.

Selecting the latest draft tells the platform to issue the policy using the latest draft version of the product module (in this case, version 2.2), instead of the published live version of the product module (in this case, version 2.0). This means the updated HTML template will be used to generate the policy schedule.
Complete the prompts to issue the policy, using your own email address when completing the policyholder contact details. You should receive the updated policy schedule in your inbox, and you can verify the change in the policy schedule wording.
Well done! You have successfully used the Workbench CLI tool to update a product module. In the next tutorial, you will use the Workbench CLI tool to make a more fundamental change to the product by adding a new benefit. This update will require various changes across different product module files.
Updated 6 months ago