Team collaboration workflow
Use GitHub to collaborate on a product module with other team members
Overview
Building insurance products often happens as a team effort. Someone might be responsible for the business and pricing logic, whilst another is responsible for styling the policy documentation to fit your brand.
Collaborating on a product module with the Workbench CLI tool can easily be achieved by introducing a version control tool like GitHub. This guide takes you through setting up your team to collaborate effectively, and assumes that you've completed the Workbench onboarding tutorial.
The Workbench CLI tool rp pull and rp push commands override all parts of a product module at the receiving end. This means that if person A edited the policy schedule and pushed it to Root, and person B edited the claims workflow locally and wants to pull Person A's changes, then person A's claims files (the old copy) will override person B's new files locally.
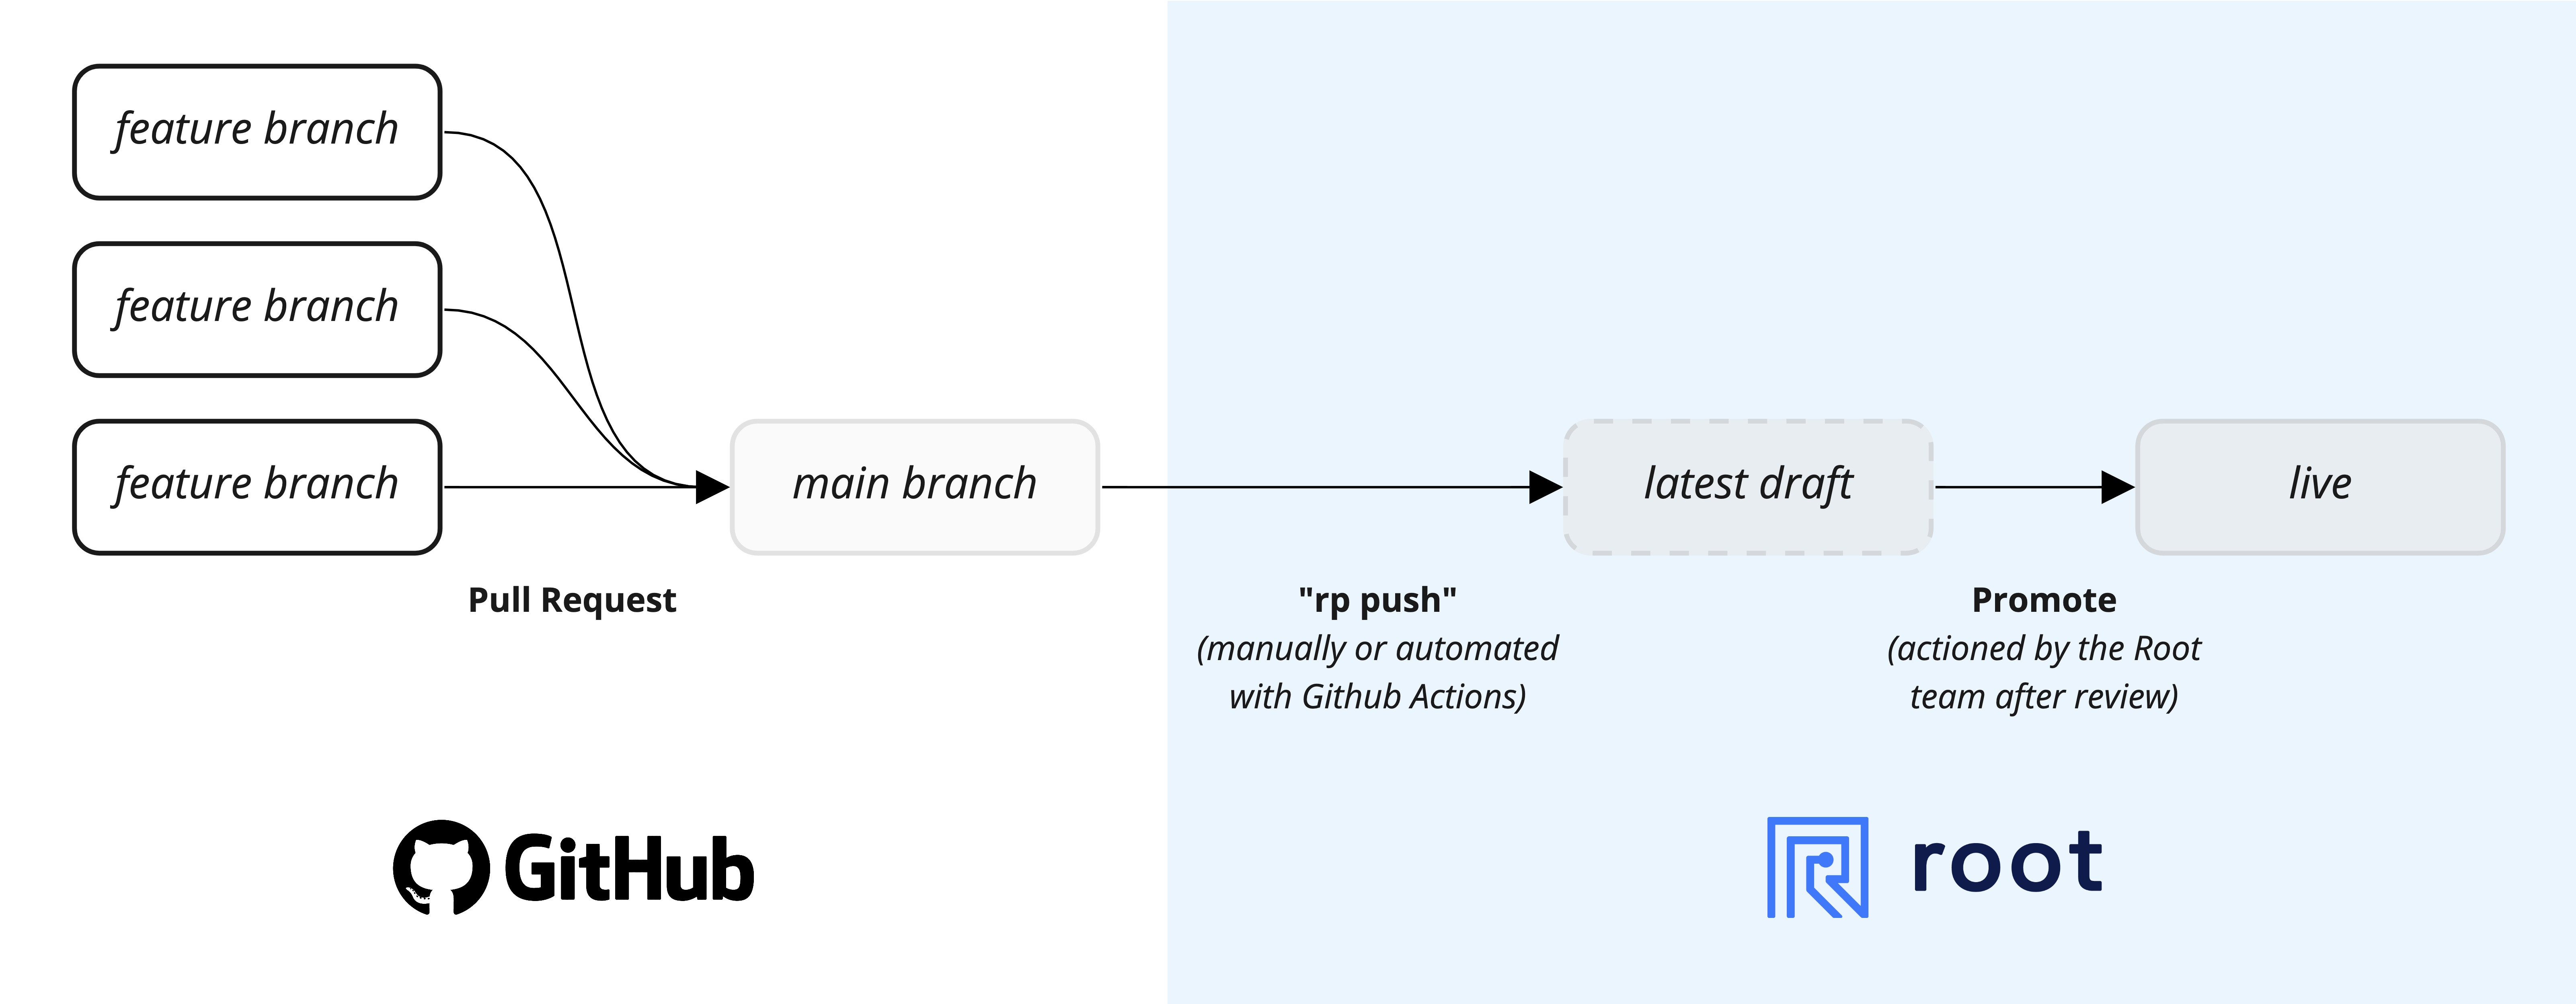
You can solve this constraint by setting up a git repository that keeps its main branch in sync with what's on Root. Then, team members collaborate in feature branches, submitting PRs with their changes into main. Once new changes are merged into main, you can use rp push to push these changes to Root (this step can be automated using Github Actions). In this workflow, you'll only ever push to Root. You won't need to pull files from Root, and will pull from GitHub instead.

Root Workbench product module development team collaboration workflow.
Let's jump into setting up this workflow for your team and the product module that you're working on.
Step 1: Clone the product module to your local machine
Clone the product module from Root to your local machine in your preferred directory using rp clone.
Step 2: Set up a new git repository
First you need to create a new repo on Github. Call it something like product-module-dinosure (where dinosure is the name of your product).
Step 3: Set up git
Navigate into the new project directory using cd, and then initialise the git repository (replace dinosure with your project directory).
$ cd dinosure
$ git init
$ git add .
$ git commit -m "Init"
$ git branch -M main
Now, let's add the GitHub repo as the origin remote:
$ git remote add origin [email protected]:YourOrgName/product-module-dinosure.gitFinally, let's push this main branch to GitHub and set it as the upstream branch:
$ git push -f -u origin mainGit is now set up and ready to use, you can push and pull changes to main, or better yet, use branches and submit pull-requests to merge into main.
Step 4: Set up a Github Action to automate deployment
With version control in place, you can proceed to automate the deployment with Root by setting up a GitHub Action to automatically run rp push -f when new changes are merged in to main from either a git push or a merged pull request.
Add a Root API key as a secret to Github
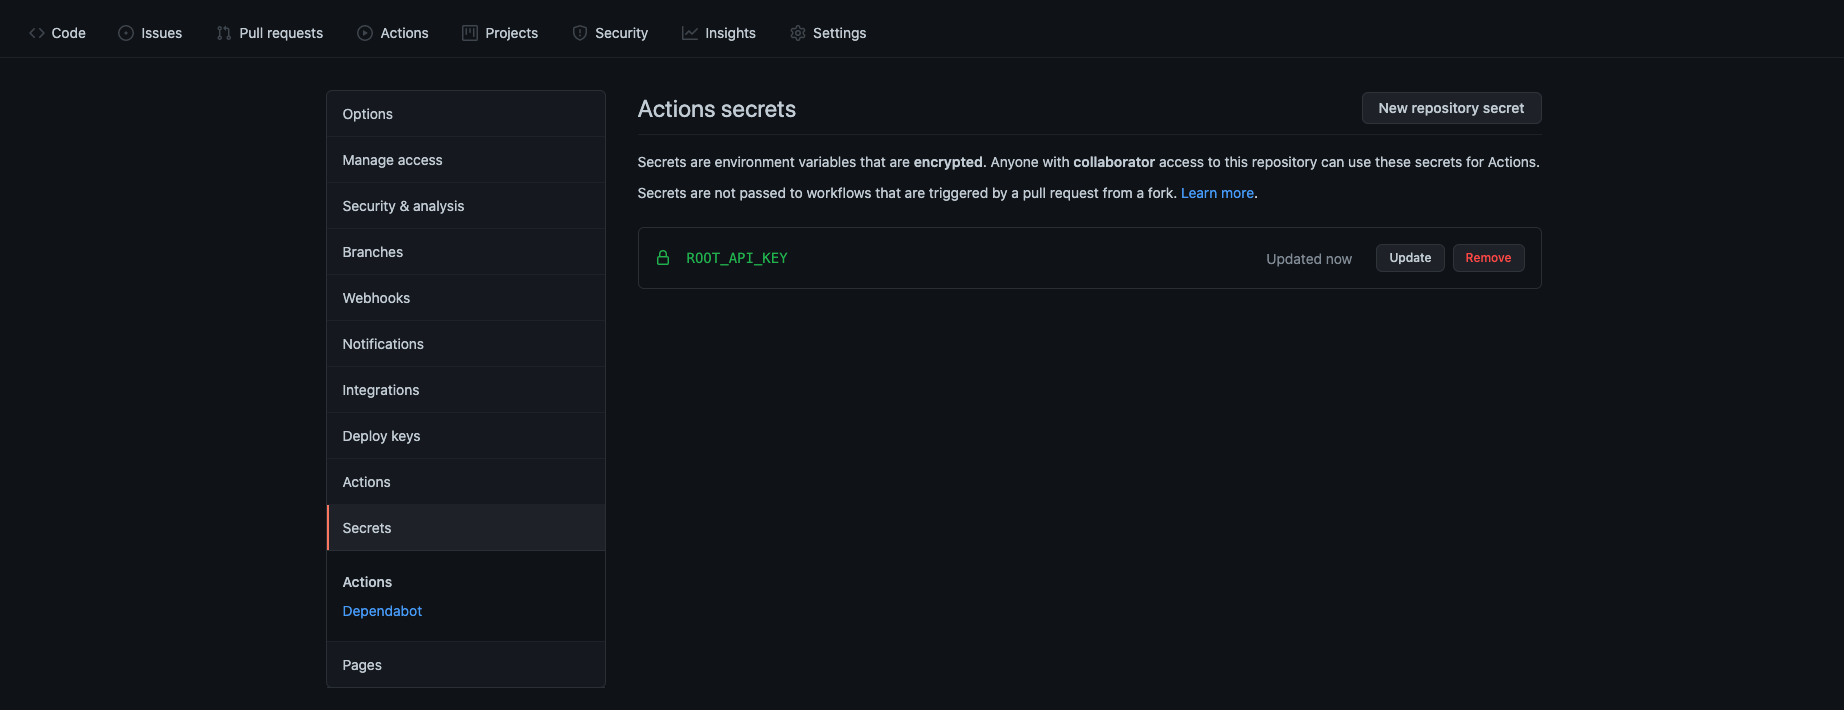
Create a new dedicated API key with read access, and add it as a secret with name ROOT_API_KEY to the Github repo. You can do this on Github by navigating to Settings > Secrets and clicking New repository secret.
Make sure you don't accidentally add a new-line to the end of the API key that you pasted when adding the secret. This will break the action.

Add a unique Root Workbench API key as Github secret with name ROOT_API_KEY.
Set up the new Action on GitHub
On GitHub, navigate to Actions and click on set up a workflow yourself.

Actions > set up a workflow yourself
Copy the code below into the main.yml code editor, overriding all the template content.
name: Root Workbench Auto-Push
on:
  push:
    branches: [ main ]
  pull_request:
    branches: [ main ]
  workflow_dispatch:
jobs:
  push:
    runs-on: ubuntu-latest
    steps:
      # Checks-out your repository under $GITHUB_WORKSPACE, so your job can access it
      - uses: actions/checkout@v2
      # Install NodeJRS
      - uses: actions/setup-node@v2
      # Runs a single command using the runners shell
      - name: Install the Root Workbench CLI tool
        run: npm i @rootplatform/cli -g
      # Runs a set of commands using the runners shell
      - name: Log the Workbench version
        run: rp -V
      # Add the Root API key to the ".root-auth" file
      - name: Create the Root API key ".root-auth" file
        env:
          api_key: ${{ secrets.ROOT_API_KEY }}
        run: echo "ROOT_API_KEY=$api_key" >> .root-auth
      # Push the product module to Root
      - name: Force push the product module to Root
        run: rp push -f
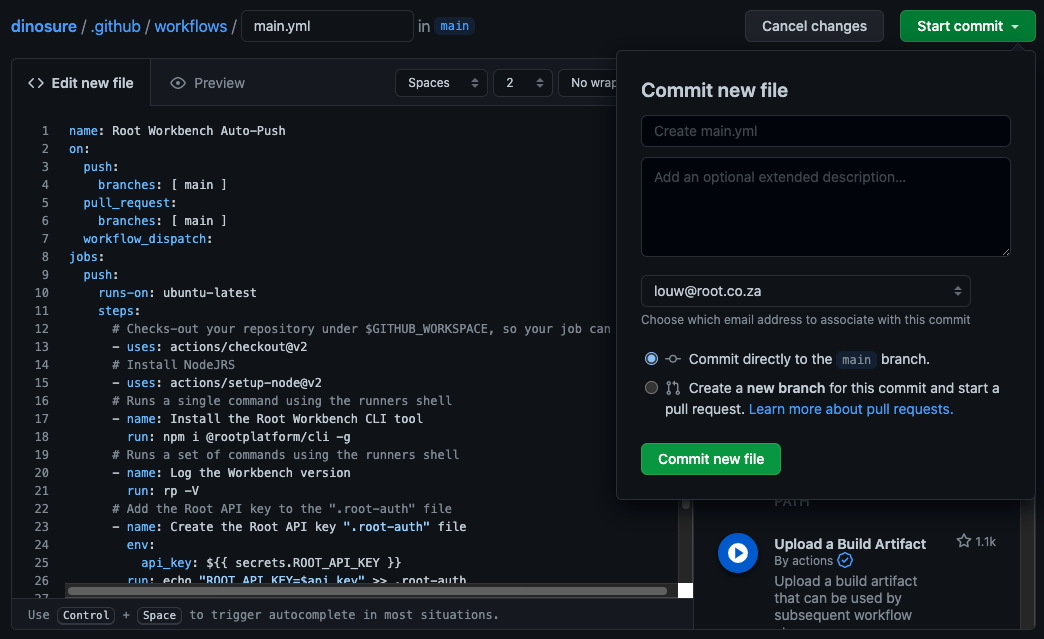
Now click "Start commit", followed by "Commit new file". This will add a new file to your project, so remember to git pull to your local machine.

Create a new Action with the yaml above and commit the new file.
At this point your action is set up and ready to go. Any git pushes or merges into main branch will trigger that Action which will force push to Root using rp push -f.
Step 5: Set up your team members
The last step is to add your team members to the project.
- Add them to the Github repository
- Let them
git clone ...the code to their local machine - They need to create their own Workbench API key on Root
- Let them add the key to their project
Adding an API key to project
The Root API key is stored in a file that's ignored by git to ensure that it's kept safe and not committed to Github. Create a .root-auth file and paste the API key in there with the following prefix ROOT_API_KEY=sandbox_QtZGZjODNlZmE.
This can easily be achieved by running the following in Terminal/Command Prompt (replace fake key with your API key):
$ echo ROOT_API_KEY=sandbox_QtZGZjODNlZmE >> .root-auth
Use a read-only API key to prevent accidental overridesIf you want to prevent team members accidentally pushing changes directly to Root, they can be issued with
read-onlyWorkbench API keys. This will be sufficient to allow using the tool locally.
Updated about 1 month ago